I kinda want to switch to Linux.
I don't know exactly when, but probably by the end of the year?
Before doing that though, I want to make sure the important stuff works.
So, like the totally normal dude I am, I've gone ahead and recompiled the emulator I use to raise the refresh rate to 240hz and raise the input polling rates of the virtual mouse to match it (and other stuff), in order to play q2pro which I built natively inside said vm; and I'm going to explain to you how I did that in this post.
I love doing this stuff. (minus the headaches)I’ve always wanted to do this.
I’m frankly mind blown that this is possible to do on windows, just a year ago I was running VirtualBox in all its laggy glory on this same computer.
This is a clip I've recorded at 120hz (OBS doesn't seem to be able to go higher than that) on my 4k screen of a Linux Mint VM running on Windows 11, I've installed q2pro to properly test the responsiveness:
To accomplish this, I’ve used QEMU (source code), a very powerful (but very hard to set up and use) free and open source emulator, that seems to be the standard emulator to run VMs on linux hosts, but is seemingly unknown in the Windows space 1.
Even if I admit it seems useless, working with such a responsive machine is blissful, everything is easier on the eyes.
IntroI’ll preface: to have 240hz and shared clipboard I had to recompile QEMU from source, that’s what I’m going to explain in this post, changing the source code and recompiling + executing the emulator with the correct parameters to get the specs we want 2.
This guide is meant as a general introduction to QEMU, but as I am myself new to it, I don't guarantee that all I say is correct, and could be completely wrong actually; but I'll try linking sources that can help you explore the features yourself.
The guide will be aimed at people that never used QEMU, but are decently knowledgeable about diffs, navigating with the CMD/terminal, git and Linux at a basic level; I'll try describing all the steps involved in compiling, creating an image, executing the VM on live CD and installing it on the image, and creating a good launch command.
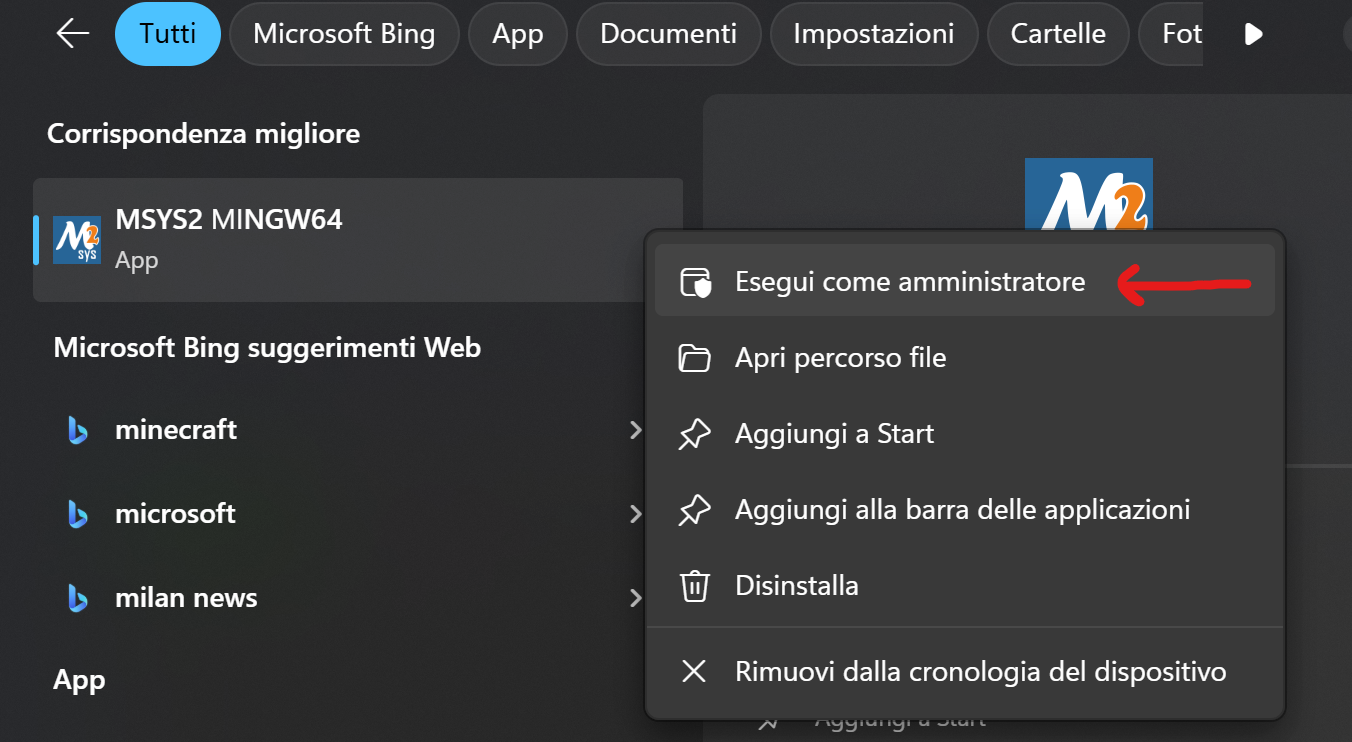
For people not familiar with VM terms, host is the machine that the VM runs on, guest is the VM itself Let’s start. Compiling QEMUFor this, I've chosen to use MinGW (qemu itself recommends it); there's plenty more options for Windows, but I am the most familiar with this. You can download it from MSYS2, just follow the instructions on the page.
After installation, run MSYS2 MINGW64 directly, as an administrator:
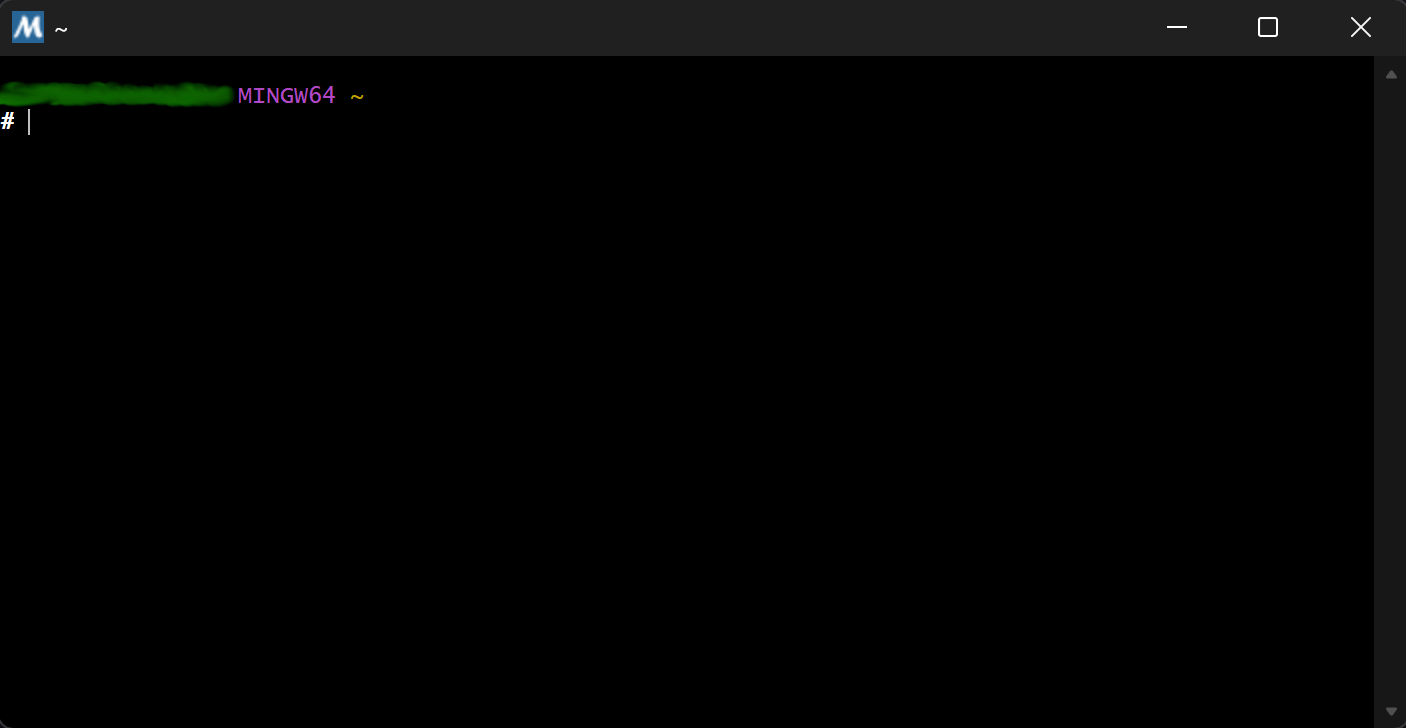
Update everything first:
user@User MINGW64 ~
$ pacman -Syu
You might need to reboot the terminal, then run this:
user@User MINGW64 ~
$ pacman -Su
It could ask for a full upgrade, confirm by typing 'y'.
Then install these packages (it’s a long one):
user@User MINGW64 ~
$ pacman -S --needed \
    base-devel \
    git \
    mingw-w64-x86_64-angleproject \
    mingw-w64-x86_64-autotools \
    mingw-w64-x86_64-capstone \
    mingw-w64-x86_64-cc \
    mingw-w64-x86_64-curl \
    mingw-w64-x86_64-cyrus-sasl \
    mingw-w64-x86_64-dtc \
    mingw-w64-x86_64-expat \
    mingw-w64-x86_64-fontconfig \
    mingw-w64-x86_64-freetype \
    mingw-w64-x86_64-fribidi \
    mingw-w64-x86_64-gcc-libs \
    mingw-w64-x86_64-gdk-pixbuf2 \
    mingw-w64-x86_64-gettext \
    mingw-w64-x86_64-glib2 \
    mingw-w64-x86_64-gmp \
    mingw-w64-x86_64-gnutls \
    mingw-w64-x86_64-graphite2 \
    mingw-w64-x86_64-gst-plugins-base \
    mingw-w64-x86_64-gstreamer \
    mingw-w64-x86_64-gtk3 \
    mingw-w64-x86_64-harfbuzz \
    mingw-w64-x86_64-jbigkit \
    mingw-w64-x86_64-lerc \
    mingw-w64-x86_64-libc++ \
    mingw-w64-x86_64-libcacard \
    mingw-w64-x86_64-libdatrie \
    mingw-w64-x86_64-libdeflate \
    mingw-w64-x86_64-libepoxy \
    mingw-w64-x86_64-libffi \
    mingw-w64-x86_64-libiconv \
    mingw-w64-x86_64-libidn2 \
    mingw-w64-x86_64-libjpeg-turbo \
    mingw-w64-x86_64-libnfs \
    mingw-w64-x86_64-libpng \
    mingw-w64-x86_64-libpsl \
    mingw-w64-x86_64-libslirp \
    mingw-w64-x86_64-libssh \
    mingw-w64-x86_64-libssh2 \
    mingw-w64-x86_64-libtasn1 \
    mingw-w64-x86_64-libthai \
    mingw-w64-x86_64-libtiff \
    mingw-w64-x86_64-libunistring \
    mingw-w64-x86_64-libunwind \
    mingw-w64-x86_64-libusb \
    mingw-w64-x86_64-libwebp \
    mingw-w64-x86_64-libwinpthread-git \
    mingw-w64-x86_64-libxml2 \
    mingw-w64-x86_64-lz4 \
    mingw-w64-x86_64-lzo2 \
    mingw-w64-x86_64-mesa \
    mingw-w64-x86_64-meson \
    mingw-w64-x86_64-nettle \
    mingw-w64-x86_64-ninja \
    mingw-w64-x86_64-openssl \
    mingw-w64-x86_64-opus \
    mingw-w64-x86_64-orc \
    mingw-w64-x86_64-p11-kit \
    mingw-w64-x86_64-pango \
    mingw-w64-x86_64-pixman \
    mingw-w64-x86_64-pkgconf \
    mingw-w64-x86_64-pkg-config \
    mingw-w64-x86_64-python \
    mingw-w64-x86_64-python3 \
    mingw-w64-x86_64-python-sphinx \
    mingw-w64-x86_64-python-sphinx_rtd_theme \
    mingw-w64-x86_64-SDL2 \
    mingw-w64-x86_64-SDL2_image \
    mingw-w64-x86_64-snappy \
    mingw-w64-x86_64-spice \
    mingw-w64-x86_64-toolchain \
    mingw-w64-x86_64-tools-git\
    mingw-w64-x86_64-usbredir \
    mingw-w64-x86_64-virglrenderer \
    mingw-w64-x86_64-xz \
    mingw-w64-x86_64-zlib \
    mingw-w64-x86_64-zstd \
    ninja \
pythonThis command installs all necessary dlls and tools to be able to build & run QEMU.
Then make sure you’re in home, or an appropriate directory:
user@User MINGW64 ~
$ cd ~
Clone QEMU’s repo using git:
user@User MINGW64 ~
$ git clone https://gitlab.com/qemu-project/qemu.git

user@User MINGW64 ~
$ cd qemu
Checkout to the correct version (in my case v10.0.2)
user@User MINGW64 ~/qemu
$ git checkout v10.0.2
Configure using QEMU’s default ./configure script:
user@User MINGW64 ~/qemu
$ ./configure \
    --disable-werror \
    --enable-sdl \
    --enable-gtk \
    --enable-slirp \
    --enable-opengl \
    --enable-virglrenderer \
    --prefix=/mingw64 \
    --host=x86_64-w64-mingw64 \
    --target-list=x86_64-softmmu
This step might throw errors right at the end if you did not launch MINGW64 as an administrator (an error relating to symlinks).
Then cd into the just created build directory and invoke ninja (the compiler)
user@User MINGW64 ~/qemu
$ cd build

user@User MINGW64 ~/qemu/build
$ ninjaIf no errors occurred, congratulations, you have just compiled QEMU from source!
Now there should be a file named qemu-system-x86_64.exe inside the qemu/build/ folder, that's what we're looking for.
Just to make sure, try starting qemu-system-x86_64.exe and see if there’s no errors, just something like this:
 (the error is normal, it doesn’t know what you want to start)
If you get a missing 'SSL_set_quic_tls_cbs' endpoint in 'libngtcp2_crypto_ossl.dll' error
This took me a day to figure out...
It means you have another version of libssl-3-x64.dll installed somewhere and Windows is picking that instead of the main one inside the C:\msys64\mingw64\bin folder; to circumvent this the only way I've found (editing PATH did not work) was to copy libcrypto-3-x64.dll and libssl-3-x64.dll directly inside of the qemu/build folder, where qemu-system-x86_64.exe resides.
To set up a VM properly, we need a distro iso; there's many, for those who don't know what to choose I'll recommend Mint, it's very beginner friendly.
Download the ISO and leave it somewhere not too hard to reach.
Now, open a cmd window and go somewhere in a folder that you'll use to store your VM/s and run this command:
X:\vm\store> qemu-img create -f qcow2 <FILE_NAME>.qcow2 40GThis will create a dynamically allocated 3 40 GB file that completely represents your virtual machine, no other files needed; it's empty for now.
Next, run this command, which will start a VM on that .qcow2 file while booting from the ISO you downloaded earlier:
X:\vm\store> qemu-system-x86_64 ^
    -accel whpx ^
    -vga virtio ^
    -m <RAM_TO_ALLOCATE> ^
    -smp <CPU_CORES_TO_ALLOCATE> ^
    -drive file=<FILE_NAME>.qcow2,format=qcow2 ^
    -cdrom "<PATH_TO_ISO>" ^
    -boot d ^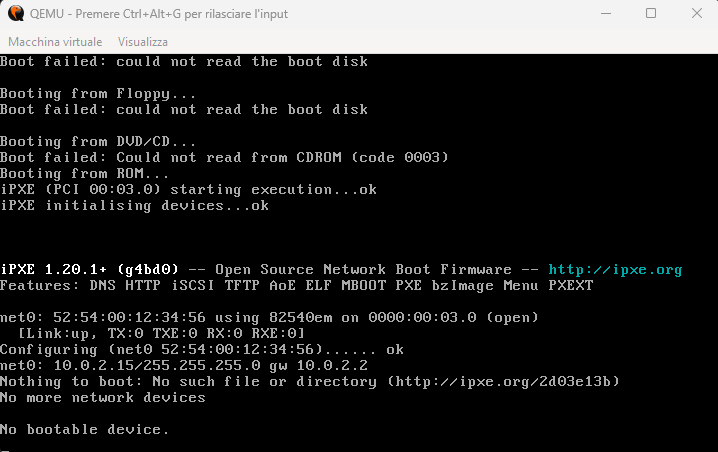
-L "<PATH_TO_QEMU_PC_BIOS>"If this command does not work (the VM freezes in the boot menu)
You have a few options:
Easiest one: -accel tcg instead of -accel whpx (pure software emulation mode, it worked for me once) just note that this setting degrades performance (it's going to be laggier) but its temporary, once you install the distro you can (in theory) switch back to -accel whpx.
The option that will probably always work: temporarily switch to WSL and install QEMU in there for this step sudo apt-get install qemu, up until you've installed the VM on the drive; the launch command for WSL would be something like (run this inside the WSL console):
qemu-system-x86_64 /
    -accel kvm /
    -vga virtio /
    -m <RAM_TO_ALLOCATE> /
    -smp <CPU_CORES_TO_ALLOCATE> /
    -cpu host -drive file=<FILE_NAME>,format=qcow2 /
    -cdrom <PATH_TO_ISO> /
    -boot d /
    -netdev user,id=net0 /
    -device virtio-net-pci,netdev=net0
Remember to convert the Windows paths to WSL paths (e.g E:\VMs\stuff becomes /mnt/e/VMs/stuff)
The 'best' but hardest option: switch the default QEMU BIOS (SeaBIOS) to TianoCore's UEFI firmware, OVMF; this gives you the 'newest gen' emulation.
To make it work I had to swap -accel whpx with -machine q35,accel=whpx and -cpu kvm64 (which btw coupled with some enhancement settings lets you use Hyper-V as much as possible for the fastest CPU performance).
I couldn't find any prebuilt binaries for OVMF for Windows though (not ones I trusted anyway, the official TianoCore mirrors give me a 403 Forbidden), so I had to build it from source... I'll make a post about this at some point, it was a bit of a headache 4.
Once you've managed to get OVMF.fd, place it under your <PATH_TO_QEMU_PC_BIOS>.
I'll leave an example command here for OVMF:
X:\vm\store> qemu-system-x86_64 ^
    -machine q35,accel=whpx ^
    -cpu kvm64,hv_relaxed,hv_vapic,hv_time,hv_synic ^
    -vga virtio ^
    -m <RAM_TO_ALLOCATE> ^
    -smp <CPU_CORES_TO_ALLOCATE> ^
    -drive file=<FILE_NAME>.qcow2,format=qcow2 ^
    -cdrom "<PATH_TO_ISO>" ^
    -boot d ^
    -L "<PATH_TO_QEMU_PC_BIOS>" ^
    -bios OVMF.fd ^
    -smbios type=2
I'll describe the placeholders used a little better:
<RAM_TO_ALLOCATE> is the amount of RAM you want the VM to have, example value '8G' (8 gigabytes)
<CPU_CORES_TO_ALLOCATE> is how many CPU cores you want the VM to have, example value '6'
<PATH_TO_QEMU_PC_BIOS> is the path to qemu/pc-bios, usually the home of MSYS is installed under C:\msys64\home\<USER> so you might want to look for qemu's folder there, example value C:\msys64\home\user1\qemu\pc-bios.
A complete example command:
X:\vm\store> qemu-system-x86_64 ^
    -accel whpx ^
    -vga virtio ^
    -m 8G ^
    -smp 4 ^
    -drive file=linux_mint.qcow2,format=qcow2 ^
    -cdrom "D:\QEMU VMs\SOs\linuxmint-22.1-cinnamon-64bit.iso" ^
    -boot d ^
    -L "C:\msys64\home\user1\qemu\pc-bios"
This will boot up QEMU under what is called a live CD (meaning a temporary Linux operating system that serves multiple purposes, e.g you can use this to fix a broken linux install).
Now you proceed with the installation steps of your distro, in the case of Mint you click on the install file on the desktop (top left):

After you've installed your chosen distro on the drive, you can turn off the VM via normal means (either shut down the VM via the GUI or by closing the window).
Then, create a .bat file, inside said .bat file put this command (replace the <STUFF> with your values):
qemu-system-x86_64 ^
    -accel whpx ^
    -m <RAM_TO_ALLOCATE> ^
    -smp <CPU_CORES_TO_ALLOCATE> ^
    -display sdl,gl=on ^
    -device virtio-vga-gl ^
    -device ich9-intel-hda ^
    -audiodev dsound,id=aud0 ^
    -device hda-duplex,audiodev=aud0 ^
    -drive file="<FILE_NAME>",format=qcow2 ^
    -device virtio-serial-pci ^
    -device usb-ehci,id=ehci ^
    -device usb-tablet,bus=ehci.0,id=mouseabs ^
    -netdev user,id=net0 ^
    -device virtio-net-pci,netdev=net0 ^
    -chardev qemu-vdagent,id=ch1,name=vdagent,clipboard=on ^
    -device virtserialport,chardev=ch1,id=ch1,name=com.redhat.spice.0 ^
    -L "<PATH_TO_QEMU_PC_BIOS>"
I'll break down the command below so you understand more what's going on:
qemu-system-x86_64 ^

# basic setup: virtualization mode, RAM & cpu cores
    -accel whpx ^
    -m 8G ^
    -smp 6 ^

# GPU accel part, we use SDL with virtio-vga-gl
    -display sdl,gl=on ^
    -device virtio-vga-gl ^

# audio setup
    -device ich9-intel-hda ^
    -audiodev dsound,id=aud0 ^
    -device hda-duplex,audiodev=aud0 ^

# drive to use (path to the .qcow2 file)
    -drive file="<FILE_NAME>",format=qcow2 ^

 # this is for all kinds of i/o
    -device virtio-serial-pci ^

# mouse input setup, can be usb-tablet (absolute coords) or usb-mouse (relative coords)
    -device usb-ehci,id=ehci ^
    -device usb-tablet,bus=ehci.0,id=mouseabs ^

# network setup, no internet without this; you can also use this to forward ports to the host
    -netdev user,id=net0 ^
    -device virtio-net-pci,netdev=net0 ^

# this is to enable clipboard sharing (other stuff is needed first though, I'll explain later)
    -chardev qemu-vdagent,id=ch1,name=vdagent,clipboard=on ^
    -device virtserialport,chardev=ch1,id=ch1,name=com.redhat.spice.0 ^

# path to the bios folder, sometimes if you don't specify this, qemu complains
    -L "<PATH_TO_QEMU_PC_BIOS>"
Double-click the .bat file and QEMU should start on your new freshly installed VM.
Fastest PerformanceIf you want to squeeze as much performance as possible, you can try removing -accel whpx and replacing it with:
X:\vm\store> qemu-system-x86_64 ^
-    -accel whpx ^
+    -machine q35,accel=whpx ^
+    -cpu kvm64,hv_relaxed,hv_vapic,hv_time,hv_synic ^
...
I tried this with my main testing Mint VM (it has like 6 different docker compose services with multiple containers each running at the same time all the time), it went from booting in ~1 minute to the Mint logo, to ~30 seconds already logged in, it becomes FAST 5.
A video cause it looks cool how fast it is:
The command is taken from QEMU's Hyper-V Enlightenments page and a FreeBSD forum post; I will not use this throughout the guide because I don't know if every host cpu can support it, and instead want to specify a command that can work on as many machines as possible. Feel free to try this one out tho! If it works, replace it for every command I have in the guide.
Example command with kvm64:
X:\vm\store> qemu-system-x86_64 ^
    -machine q35,accel=whpx ^
    -cpu kvm64,hv_relaxed,hv_vapic,hv_time,hv_synic ^
    -vga virtio ^
    -m <RAM_TO_ALLOCATE> ^
    -smp <CPU_CORES_TO_ALLOCATE> ^
    -drive file=<FILE_NAME>.qcow2,format=qcow2 ^
    -L "<PATH_TO_QEMU_PC_BIOS>"
This is the command I use for my VMs (fastest performance I managed to get):
qemu-system-x86_64 ^
    -machine q35,accel=whpx ^
    -cpu kvm64,hv_relaxed,hv_vapic,hv_time,hv_synic ^
    -m <RAM_TO_ALLOCATE> ^
    -smp <CPU_CORES_TO_ALLOCATE> ^
    -display sdl,gl=on ^
    -device virtio-vga-gl ^
    -device ich9-intel-hda ^
    -audiodev dsound,id=aud0 ^
    -device hda-duplex,audiodev=aud0 ^
    -drive file=<FILE_NAME>,format=qcow2 ^
    -device virtio-serial-pci ^
    -device usb-ehci,id=ehci ^
    -device usb-tablet,bus=ehci.0,id=mouseabs ^
    -netdev user,id=net0 ^
    -device virtio-net-pci,netdev=net0 ^
    -chardev qemu-vdagent,id=ch1,name=vdagent,clipboard=on ^
    -device virtserialport,chardev=ch1,id=ch1,name=com.redhat.spice.0 ^
    -L <PATH_TO_QEMU_PC_BIOS>
If you're using OVMF, this is the fastest command I've found (I just added the two lines at the end):
qemu-system-x86_64 ^
    -machine q35,accel=whpx ^
    -cpu kvm64,hv_relaxed,hv_vapic,hv_time,hv_synic ^
    -m <RAM_TO_ALLOCATE> ^
    -smp <CPU_CORES_TO_ALLOCATE> ^
    -display sdl,gl=on ^
    -device virtio-vga-gl ^
    -device ich9-intel-hda ^
    -audiodev dsound,id=aud0 ^
    -device hda-duplex,audiodev=aud0 ^
    -drive file=<FILE_NAME>,format=qcow2 ^
    -device virtio-serial-pci ^
    -device usb-ehci,id=ehci ^
    -device usb-tablet,bus=ehci.0,id=mouseabs ^
    -netdev user,id=net0 ^
    -device virtio-net-pci,netdev=net0 ^
    -chardev qemu-vdagent,id=ch1,name=vdagent,clipboard=on ^
    -device virtserialport,chardev=ch1,id=ch1,name=com.redhat.spice.0 ^
    -L <PATH_TO_QEMU_PC_BIOS> ^
    -bios OVMF.fd ^
-smbios type=2Now for the hard part, we’ll need to adjust some of the source code to implement 240hz+ and shared clipboard.
Note: Just in case people can (justifiably) remain confused I'll write it down; the file paths (e.g hw\display\edid-generate.c) I'm going to write down below are relative to the root qemu/ folder not the build/ folder that we built qemu on.
Refresh RateTo set a custom refresh rate, we have to edit the file under hw\display\edid-generate.c:
....
void qemu_edid_generate(uint8_t *edid, size_t size,
                        qemu_edid_info *info)
{
    Timings timings;
    uint8_t *desc = edid + 54;
    uint8_t *xtra3 = NULL;
    uint8_t *dta = NULL;
    uint8_t *did = NULL;
    uint32_t width_mm, height_mm;
-   uint32_t refresh_rate = info->refresh_rate ? info->refresh_rate : 75000;
+   uint32_t refresh_rate = info->refresh_rate ? info->refresh_rate : 240000;
    uint32_t dpi = 100; /* if no width_mm/height_mm */
    uint32_t large_screen = 0;

    /* =============== set defaults  =============== */

    if (!info->vendor || strlen(info->vendor) != 3) {
....
You can set the value to whatever you want, for example 360Hz would be 360000.
That's it, Then you recompile QEMU:
user@User MINGW64 ~/qemu/build
$ ninjaTurns out that QEMU's devs didn't think a guy would've been interested in having high refresh rate screens in a VM (understandably), so they set the input polling intervals to reasonable values for 60hz; problem is that mouse movement is very noticeably stuttery at 240Hz using the stock settings, so we need to modify a couple of them.
.....
    [STR_SERIAL_KEYBOARD]  = "68284",
};

static const USBDescIface desc_iface_mouse = {
    .bInterfaceNumber              = 0,
    .bNumEndpoints                 = 1,
....
        },
    .eps = (USBDescEndpoint[]) {
        {
            .bEndpointAddress      = USB_DIR_IN | 0x01,
            .bmAttributes          = USB_ENDPOINT_XFER_INT,
            .wMaxPacketSize        = 4,
-            .bInterval             = 0x0a,
+            .bInterval             = 0x01,
        },
    },
};

static const USBDescIface desc_iface_mouse2 = {
    .bInterfaceNumber              = 0,
    .bNumEndpoints                 = 1,
    .bInterfaceClass               = USB_CLASS_HID,
.....
        },
    .eps = (USBDescEndpoint[]) {
        {
            .bEndpointAddress      = USB_DIR_IN | 0x01,
            .bmAttributes          = USB_ENDPOINT_XFER_INT,
            .wMaxPacketSize        = 4,
-            .bInterval             = 7, /* 2 ^ (8-1) * 125 usecs = 8 ms */
+            .bInterval             = 1, /* 2 ^ (8-7) * 125 usecs = <1 ms */
        },
    },
};

static const USBDescIface desc_iface_tablet = {
    .bInterfaceNumber              = 0,
....
This sets the polling intervals for our two main input methods (usb-mouse and usb-tablet) to pretty much the minimum level, 1ms.
...
#define QEMU_NUM_LOCK_LED    (1 << 1)
#define QEMU_CAPS_LOCK_LED   (1 << 2)

/* in ms */
- #define GUI_REFRESH_INTERVAL_DEFAULT    30
+ #define GUI_REFRESH_INTERVAL_DEFAULT    1
#define GUI_REFRESH_INTERVAL_IDLE     3000

/* Color number is match to standard vga palette */
enum qemu_color_names {
...
This sets the SDL input polling rate from ~30ms to ~1 ms.
Recompile QEMU:
user@User MINGW64 ~/qemu/build
$ ninja
This way input polling will be as fast as it can, making the mouse actually smooth.
In late 2023, Kamay Xutax posted a commit that implements clipboard sharing on the SDL display of QEMU, all of the code below is taken from said patch.
@@ -21,6 +21,7 @@
# include <SDL_image.h>
#endif

+ #include "ui/clipboard.h"
#include "ui/kbd-state.h"
#ifdef CONFIG_OPENGL
# include "ui/egl-helpers.h"
@@ -51,6 +52,7 @@
    bool y0_top;
    bool scanout_mode;
#endif
+   QemuClipboardPeer cbpeer;
};

void sdl2_window_create(struct sdl2_console *scon);
@@ -70,6 +72,9 @@
bool sdl2_2d_check_format(DisplayChangeListener *dcl,
                        pixman_format_code_t format);

+ void sdl2_clipboard_handle_request(struct sdl2_console *scon);
+ void sdl2_clipboard_init(struct sdl2_console *scon);
void sdl2_gl_update(DisplayChangeListener *dcl,
                    int x, int y, int w, int h);
void sdl2_gl_switch(DisplayChangeListener *dcl,@@ -2157,6 +2157,7 @@ config_host_data.set('CONFIG_RDMA', rdma.found())
config_host_data.set('CONFIG_RELOCATABLE', get_option('relocatable'))
config_host_data.set('CONFIG_SAFESTACK', get_option('safe_stack'))
config_host_data.set('CONFIG_SDL', sdl.found())
+ config_host_data.set('CONFIG_SDL_CLIPBOARD', sdl.found())
config_host_data.set('CONFIG_SDL_IMAGE', sdl_image.found())
config_host_data.set('CONFIG_SECCOMP', seccomp.found())
if seccomp.found()@@ -125,6 +125,7 @@ if sdl.found()
sdl_ss = ss.source_set()
sdl_ss.add(sdl, sdl_image, pixman, glib, files(
'sdl2-2d.c',
+ 'sdl2-clipboard.c',
'sdl2-input.c',
'sdl2.c',
))@@ -710,6 +710,11 @@ void sdl2_poll_events(struct sdl2_console *scon)
case SDL_WINDOWEVENT:
handle_windowevent(ev);
break;
+ #if defined(CONFIG_SDL_CLIPBOARD)
+ case SDL_CLIPBOARDUPDATE:
+ sdl2_clipboard_handle_request(scon);
+ break;
+ #endif
default:
break;
}
@@ -930,6 +935,9 @@ static void sdl2_display_init(DisplayState *ds, DisplayOptions *o)
qemu_console_set_window_id(con, info.info.x11.window);
#endif
}
#endif
+ #if defined(CONFIG_SDL_CLIPBOARD)
+ sdl2_clipboard_init(&sdl2_console[i]);
+ #endif
}Then create a new file under ui/sdl2-clipboard.c:
/*
* SDL UI -- clipboard support
*
* Copyright (C) 2023 Kamay Xutax <[email protected]>
*
* This program is free software; you can redistribute it and/or modify
* it under the terms of the GNU General Public License as published by
* the Free Software Foundation; either version 2 of the License, or
* (at your option) any later version.
*
* This program is distributed in the hope that it will be useful,
* but WITHOUT ANY WARRANTY; without even the implied warranty of
* MERCHANTABILITY or FITNESS FOR A PARTICULAR PURPOSE.  See the GNU
* General Public License for more details.
*
* You should have received a copy of the GNU General Public License
* along with this program; if not, see <http://www.gnu.org/licenses/>.
*
*/
#include "qemu/osdep.h"
#include "qemu/main-loop.h"
#include "ui/sdl2.h"
static void sdl2_clipboard_update(struct sdl2_console *scon,
                                QemuClipboardInfo *info)
{
    bool self_update = info->owner == &scon->cbpeer;
    char *text;
    size_t text_size;
    /*
    * In case of a self update,
    * set again the text in SDL
    *
    * This is a workaround for hosts that have clipboard history
    * or when they're copying again something,
    * so that SDL can accept a new request from the host
    * and make a new SDL_CLIPBOARDUPDATE event
    */
    if (self_update) {
        text = SDL_GetClipboardText();
        SDL_SetClipboardText(text);
        SDL_free(text);
        return;
    }
    if (!info->types[QEMU_CLIPBOARD_TYPE_TEXT].available) {
        return;
    }
    info = qemu_clipboard_info_ref(info);
    qemu_clipboard_request(info, QEMU_CLIPBOARD_TYPE_TEXT);
    while (info == qemu_clipboard_info(info->selection) &&
        info->types[QEMU_CLIPBOARD_TYPE_TEXT].available &&
        info->types[QEMU_CLIPBOARD_TYPE_TEXT].data == NULL) {
        main_loop_wait(false);
    }
    /* clipboard info changed while waiting for data */
    if (info != qemu_clipboard_info(info->selection)) {
        qemu_clipboard_info_unref(info);
        return;
    }
    /* text is not null terminated in cb info, so we need to copy it */
    text_size = info->types[QEMU_CLIPBOARD_TYPE_TEXT].size;
    if (!text_size) {
        qemu_clipboard_info_unref(info);
        return;
    }
    text = malloc(text_size + 1);
    if (!text) {
        qemu_clipboard_info_unref(info);
        return;
    }
    text[text_size] = 0;
    memcpy(text, info->types[QEMU_CLIPBOARD_TYPE_TEXT].data, text_size);
    /* unref as soon we copied the text */
    qemu_clipboard_info_unref(info);
    SDL_SetClipboardText(text);
    free(text);
}
static void sdl2_clipboard_notify(Notifier *notifier,
                                void *data)
{
    QemuClipboardNotify *notify = data;
    struct sdl2_console *scon =
        container_of(notifier, struct sdl2_console, cbpeer.notifier);
    switch (notify->type) {
    case QEMU_CLIPBOARD_UPDATE_INFO:
        sdl2_clipboard_update(scon, notify->info);
        break;
    case QEMU_CLIPBOARD_RESET_SERIAL:
        break;
    }
}
static void sdl2_clipboard_request(QemuClipboardInfo *info,
                                QemuClipboardType type)
{
    struct sdl2_console *scon =
        container_of(info->owner, struct sdl2_console, cbpeer);
    char *text;
    switch (type) {
    case QEMU_CLIPBOARD_TYPE_TEXT:
        if (!SDL_HasClipboardText()) {
            return;
        }
        text = SDL_GetClipboardText();
        qemu_clipboard_set_data(&scon->cbpeer, info, type,
                                strlen(text), text, true);
        SDL_free(text);
        break;
    default:
        return;
    }
}
void sdl2_clipboard_handle_request(struct sdl2_console *scon)
{
    g_autoptr(QemuClipboardInfo) info =
        qemu_clipboard_info_new(&scon->cbpeer,
                                QEMU_CLIPBOARD_SELECTION_CLIPBOARD);
    sdl2_clipboard_request(info, QEMU_CLIPBOARD_TYPE_TEXT);
}
void sdl2_clipboard_init(struct sdl2_console *scon)
{
    scon->cbpeer.name = "sdl2";
    scon->cbpeer.notifier.notify = sdl2_clipboard_notify;
    /* requests will be handled from the SDL event loop */
    qemu_clipboard_peer_register(&scon->cbpeer);
}
Finally we're done; now you need to recompile QEMU:
user@User MINGW64 ~/qemu/build
$ ninja
It should take a lot less compared to the first time.
After that, start the QEMU VM, open up a terminal and install spice-vdagent:
$ sudo apt update
$ sudo apt install spice-vdagent
This installs both the system service (spice-vdagentd) and the desktop daemon (spice-vdagent).
Start and enable the service (so it runs after reboot):
$ sudo systemctl enable --now spice-vdagentThen, the spice portion of our launch command will take effect and you will be able to copy on the host/guest and paste on the guest/host:
qemu-system-x86_64 [ …other options… ] ^
    ...
    -chardev qemu-vdagent,id=ch1,name=vdagent,clipboard=on ^
    -device virtio-serial-pci ^
    -device virtserialport,chardev=ch1,id=ch1,name=com.redhat.spice.0 ^
    ...
Now everything should be done, if you try copying from guest to host or viceversa and paste on the opposite end, it should work:
Small Note: I got a KDE Neon VM too and in there the copy/paste doesn't seem to work as well as Mint (Edit: this could happen with Fedora too apparently), copy from host to guest works fine, but in the opposite way, just after copying for some reason I need to put a Chromium window in focus otherwise the copy is not propagated, even a single instant is enough to trigger the propagation to the host, maybe I'll investigate this further eventually. Edit later: turns out KDE Neon by default uses Wayland, and spice-vdagent doesn't properly support clipboard sharing on it (spice-vdagent watches X11's clipboard for events). You can fix this by setting the Session to 'X11' in the Login page (bottom left), but be warned that in my experience this locks the display at ~60hz. Technically this would be patched in the future, but for now I'll point to these two sources if you're interested. A note for High-DPI configurationsI have probably the worst possible multi-monitor setup; every monitor has a different resolution, refresh rate and scaling value, this means applications usually complain; QEMU is one of them.
The issue was that my primary monitor is 1080p at 100% scaling, and my secondary monitor is 4k at 200% scaling; QEMU would correctly pick the 200% scaling on the second monitor, but it would 'virtualize?' the resolution to 1080p, so it wasn't really rendering at 4k on my 4k screen.
To fix this I set qemu-system-x86_64.exe's DPI override properties to Application, maybe someone will have the same issue.

This has a small side effect where the titlebar of the QEMU window on a 4k screen is extremely small, but actually in this case it's better in my opinion, more screen real estate for the VM.
AddendumsThese will be a couple of things that are not really the point of the post but that'll help in making the VM feel more 'complete', stuff like shared folders, networking, etc..
Mouse ToggleAn issue I noticed upon first firing up q2pro on the VM was that the mouse was completely broken:
This is caused by the fact that I'm using usb-tablet in the launch command; usb-tablet feeds absolute mouse coordinates instead of relative (delta) ones, so q2pro complains a lot.
To fix it, after some trial and error I've noticed usb-mouse works well; but I didn't want to restart the VM every time I wanted to test the game (usb-mouse makes it so you can't enter and leave the QEMU window seamlessly).
To get around the issue I've modified the source code and added a key shortcut to toggle between usb-tablet and usb-mouse in real time; I'll show how I did that.
......
#include "system/system.h"
#include "qemu/log.h"
#include "qemu-main.h"

+ #include "hw/qdev-core.h"
+ #include "qemu/error-report.h"

+ #include "migration/vmstate.h"
+ #include "monitor/qdev.h"

........

void sdl2_poll_events(struct sdl2_console *scon)
{
    SDL_Event ev1, *ev = &ev1;
    bool allow_close = true;
    int idle = 1;

    if (scon->last_vm_running != runstate_is_running()) {
        scon->last_vm_running = runstate_is_running();
        sdl_update_caption(scon);
    }

    while (SDL_PollEvent(ev)) {
        switch (ev->type) {
        case SDL_KEYDOWN:
            idle = 0;

+            if ((ev->key.keysym.mod & KMOD_CTRL) &&
+                ev->key.keysym.sym == SDLK_m) {
+                Error *err = NULL;
+                DeviceState *old, *d;
+
+                /* unplug the relative mouse if it exists */
+                old = qdev_find_recursive(sysbus_get_default(), "mouserel");
+                if (old) {
+                    char *id = strdup("mouseabs");
+
+                    /* grab the USB bus the old device lives on */
+                    BusState *bus = qdev_get_parent_bus(old);
+
+                    /* unplug the old mouse */
+                    qdev_unplug(old, &err);
+
+                    /* create/tablet */
+                    d = qdev_new("usb-tablet");
+                    qdev_set_id(d, id, &err);
+                    qdev_realize_and_unref(d, bus, &err);
+                    sdl_mouse_mode_change(NULL, NULL);
+                }
+                else{
+                    /* otherwise, unplug the tablet and re-create the mouse */
+                    old = qdev_find_recursive(sysbus_get_default(), "mouseabs");
+
+                    if(old){
+                        char *id = strdup("mouserel");
+
+                        /* grab the USB bus the old device lives on */
+                        BusState *bus = qdev_get_parent_bus(old);
+
+                        /* unplug the old mouse */
+                        qdev_unplug(old, &err);
+                        d = qdev_new("usb-mouse");
+                        qdev_set_id(d, id, &err);
+                        qdev_realize_and_unref(d, bus, &err);
+                    }
+                    else{
+                        error_report("no device found! something wrong with the code\n");
+                    }
+                }
+
+                if (err) {
+                    error_report("Error during mouse-tablet switch: %s\n", error_get_pretty(err));
+                    error_free(err);
+                }
+            }

            handle_keydown(ev);
            break;
        case SDL_KEYUP:
....
Recompile QEMU:
user@User MINGW64 ~/qemu/build
$ ninjaNow, if you press Ctrl + M (and click on the window again) you can toggle between the two mouse modes 6, maybe it'll be useful in some scenarios.
If you want to change the keybind, change these two lines:
...
while (SDL_PollEvent(ev)) {
        switch (ev->type) {
        case SDL_KEYDOWN:
            idle = 0;

-            if ((ev->key.keysym.mod & KMOD_CTRL) &&
-                ev->key.keysym.sym == SDLK_m) {
+            if ((ev->key.keysym.mod & KMOD_LALT) &&
+                ev->key.keysym.sym == SDLK_a) {
                Error *err = NULL;
                DeviceState *old, *d;
...
This would change the keybind from Ctrl + M to Left Alt + A, I've used these two to find which key has which code.
Mouse Click ThroughAnother issue with the mouse I noticed is that when QEMU's window is not in focus, and you want to click something inside of it, you need to click twice. This is because SDL swallows the first click upon focusing the window; we can disable this behaviour by setting the SDL_HINT_MOUSE_FOCUS_CLICKTHROUGH hint to "1" just before initializing the SDL window.
...
static void sdl2_display_init(DisplayState *ds, DisplayOptions *o)
{
    uint8_t data = 0;
    int i;
    SDL_SysWMinfo info;
...
+    SDL_SetHint(SDL_HINT_MOUSE_FOCUS_CLICKTHROUGH, "1");
    if (SDL_Init(SDL_INIT_VIDEO)) {
        fprintf(stderr, "Could not initialize SDL(%s) - exiting\n",
                SDL_GetError());
        exit(1);
    }
#ifdef SDL_HINT_VIDEO_X11_NET_WM_BYPASS_COMPOSITOR /* only available since SDL 2.0.8 */
    SDL_SetHint(SDL_HINT_VIDEO_X11_NET_WM_BYPASS_COMPOSITOR, "0");
...
Now, when you click inside of QEMU's window when it's not focused, the click will go through and apply instantly.
Forwarding PortsIf you want to forward ports to test web apps in your host too, you can modify your launch command's -netdev user,id=net0 section by specifying ports to forward, like this:
-netdev user,id=net0,hostfwd=tcp::3000-:3000,hostfwd=tcp::8080-:8080,hostfwd=tcp::8008-:8008,hostfwd=tcp::8443-:8443,hostfwd=tcp::8843-:8843...This way, when on the host you go to localhost:3000 on like a Firefox tab, it should correctly talk to the guest and give you the service you exposed on port 3000 inside the VM (mind ufw, the firewall, if you've enabled it in the guest).
Shared FolderTo share files between host and guest through a folder, there's two ways (that I've found):
A dummy local Windows account for the guest
Set up a proper Network Bridge (AFAIK this requires Hyper-V Management Console, a Windows Pro feature)
I went the less smart and less expensive way (dummy local account) so I'll explain that process in this chapter.
So, we'll have to create a local account:
Go to Settings -> Account -> down below Other Users:

Then click the blue button Add Account.
Next, Microsoft in it's wise ways will ask in every possible way to connect it to a Microsoft Account, just click the little option below I don't have information about this user and then Add without a Microsoft Account.
Then you set username and password:
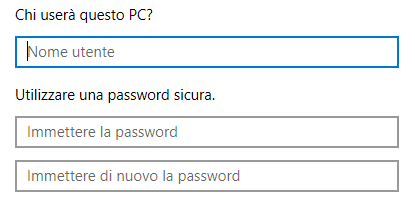
And there you go!
Then, we need to share and set permissions to the folder you want to share.
Go to said folder, right click -> Properties -> Sharing Tab -> Advanced Sharing:
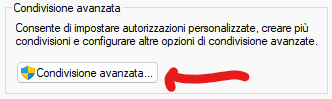
Then click on Authorizations (or whatever it's called in your language).

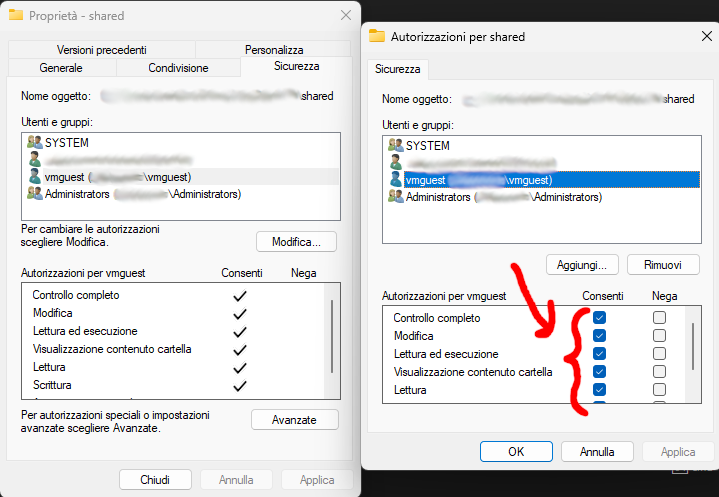
Then click Add, type the name of the local account we created and set Everything to enabled (full control).
Now, important, do the same in the Security tab, else you will get a Permission Error afterwards:
Then, we need to get into the VM and run a couple commands.
$ sudo mount -t cifs \
    //10.0.2.2/<NAME_OF_THE_HOST_FOLDER> \
    <GUEST_PATH> \
    -o username=vmguest,password=<PASSWORD>,uid=$(id -u),gid=$(id -g),vers=3.0
Example command:
$ sudo mount -t cifs \
    //10.0.2.2/shared \
    /mnt/windows_shared \
    -o username=vmguest,password=hunter2,uid=$(id -u),gid=$(id -g),vers=3.0
10.0.2.2 is the default ip QEMU gives the host (provided you gave a network device in your launch command, the command I gave you earlier already includes it), you should be able to ping it and get a response.
This is only a temporary mount; you can make it permament by adding this line to /etc/fstab:
//10.0.2.2/<NAME_OF_THE_HOST_FOLDER> <GUEST_PATH> cifs username=vmguest,password=<PASSWORD>,uid=1000,gid=1000,vers=3.0 0 0Then, you can test the mount using:
$ sudo mount -aIf no errors appeared, then you should be ready to go, as long as the folder you set in the guest already exists you should be able to view the contents and copy/paste files from both ends.
Issues with P/E cores and -accel whpxI'm still figuring this out, but I've been fighting my KDE Neon VM over freezing when I open Discover on my desktop pc; as soon as I open it, either the screen completely freezes/goes black and the VM becomes unresponsive, or I get a raw terminal that says stuff about SEGVs (while still being completely frozen) forcing me to hard close the window, while it works fine on -accel tcg (slow as hell tho).
I later tried doing the same on my laptop with -accel whpx and it worked flawlessly, this can only make me think that the architecture of my desktop's CPU (a last gen i9, my laptop mounts a 2021 i7) doesn't fare well with QEMU's whpx setting. Keep this in mind, maybe if you stumble on the same issue try using a program like Process Lasso to turn off E-cores for QEMU's running process (I still haven't tested this though I'll update when I manage to test it better).
ConclusionWell, this turned out a lot longer than I expected 7, and for sure I made some mistakes along the way; if you spot some, feel free to point them out and I'll correct them 8.
This was my first proper blog post too, and I'm not used to writing (esp. in English) so I've probably used the wrong terms here and there 9.
Thank you for reading my wall of text! I got plenty of other stuff I'm working on (and plenty new stuff that I want to work on.. rip me) so I'll definitely keep posting.
See ya.
Comments
No comments yet.